- Home
-
Forums
- Good Game HQ
- Tournaments & Events
- Gaming
- Off-Topic
- Members
-
Info
- Reviews
- Feature Articles
- Gaming News
- Guides & Tips
- Videos
- Clan Directory
-
Events
- General Rules
- Match, Tourney & Event News
- Hall of Fame
- Community Events
- KZ:SF Coop
How to DMZ your PS3
Dramatically improve your connection for online gaming
Having issues connecting to your friends when playing online? Difficulty finding or connecting to games? Are games telling you that you have a Strict NAT Type or an incorrect NAT Type? Well read on to overcome all of these issues and improve your online gaming experience.
Your internet router contains a firewall. The purpose of this firewall is to protect the computers on your network from nasties on the internet. Unfortunately, in blocking these nasties it can also inadvertently block traffic you want coming into your PS3, specifically that of other players you want to play with. It can also have a dire affect on your network latency, known to gamers as 'Lag'.
DMZ stands for 'Demilitarised Zone', it's a machine address that is completely exposed to the internet. We're going to use a DMZ to completely expose your PS3 to the internet, disabling the firewall between them.
Note that this guide is designed specifically with routers in mind, rather than combined modem-routers. If you've got a combined modem-router, most of these steps should be similar or even the same, but there may be some subtle differences. If you have any issues, post in the forum thread linked at the bottom of the article.
Set Static IP Address
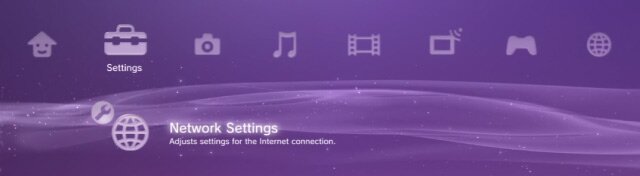
Step 1
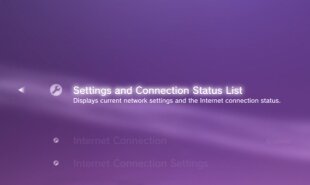
Start your PS3 up, when at the XMB scroll left until you reach Settings. Scroll down to Network Settings, select that then Settings and Connection Status List.
You should be greeted by the screen to the right.
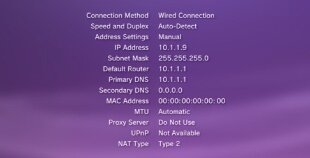
At this point take a note:
Your IP Address will look something like 10.1.1.X as per the example, or 192.168.1.X
Your Default Router will be either 10.1.1.1 as per the example, or 192.168.1.1
Step 2
Press Circle on your controller to exit this screen, then scroll down to Internet Connection Settings.
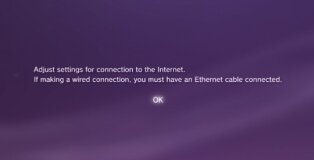
You will now be greeted by a screen warning you that if you're connecting via a wired connection, you must have an Ethernet cable connected. Select OK as pictured right.
Step 3
You will have options to Select a Setting Method. Select Custom.
Then you will have options for Select a Connection Method. Select Wired Connection or Wireless depending on how you connect to your modem with your PS3.
If you selected wireless please follow added instructions to the right, then continue on
to Step 4.
If you selected wired, you'll now be asked to select the operation mode of the network device. Select Auto-Detect.
Step 4
Whether you chose wireless or wired, next you’ll have three IP Address Setting options to select from. Select Manual.
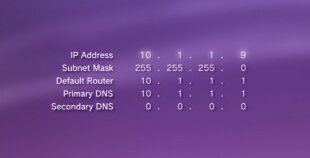
You'll now see the screen as pictured to the right but without the numbers entered (if you've never manually entered any).
Wireless
Once you’ve selected Wireless you’ll have three WLAN Setting options to choose from. Select Scan. Next you’ll have to choose the access point to be used. Select your SSID. Then scroll to the right until you get to WLAN Security Setting. Select the setting used by your router (usually WPA - check your router's settings if there are any issues). If your router's password hasn't been changed from the default, you’ll then have to type in the number usually located on the bottom of your router (it should be labelled WPA). Once entered, select Enter. There should be an added arrow to the right of your screen, scroll to the right, and that will take you to Step 4.
Step 5
At this screen you’ll need to enter your custom IP Address and also the IP Address of your modem.
If using an IP Address simliar to 192.168.1.X - enter:
IP Address: 192.168.1.9
Subnet Mask: 255.255.255.0
Default Router: 192.168.1.1
Primary DNS: 192.168.1.1
Secondary DNS: 192.168.1.1
If using an IP Address similar to
10.1.1.X - enter:
IP Address: 10.1.1.9
Subnet Mask: 255.255.255.0
Default Router: 10.1.1.1
Primary DNS: 10.1.1.1
Secondary DNS: 10.1.1.1
MTU
Select Automatic
Proxy Server
Select Do Not Use
UPnP
Select Enable
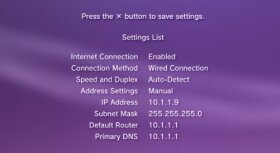
Now you can review the details you entered as per the image below and press X to save the settings when you are ready.
Step 6
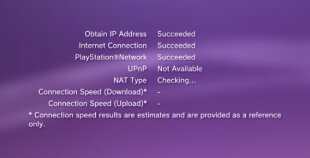
After you've saved the settings, you'll be prompted to test the connection to check that it works. Run the test, and if all goes smoothly the congratulations, your PS3 will now have a static IP Address of either 192.168.1.9 or 10.1.1.9 depending how your modem is configured. If you have any issues, post the details here and we'll do our best to help.
Configure your Modem
The methods to configuring a modem to provide a DMZ can be many and varied. Below is a basic guide to how it'll be achieved on many modems, however we recommend you use Google or refer to your modem's instruction manual.
Using a computer connected to your modem, open a web browser and in the address bar enter either: 192.168.1.1 or 10.1.1.1
You should now see your modem's log in screen, requesting just a password OR a username and password. Generally the username will be 'admin' and the password will be 'admin' or 'root', but please refer to Google or your modem's instruction manual to be sure.
Once you have logged into your modem you should see a list of menu links, often down the left hand side. What you're seeking here is the Firewall menu, it can often be within Advanced Setup if it's not already visible.
Within Firewall you should see DMZ, Virtual DMZ Host or DMZ Host, select it. In the next screen you need to select Enable DMZ or Enable Virtual DMZ Host.
Still within the DMZ Configuration, enter the IP Address of your PS3 that you set earlier, either 192.168.1.9 or 10.1.1.9, now select Save Settings and you're done. The modem should reset itself and reconnect to the internet.
To ensure the DMZ has been effective you can return to your PS3, select Settings and Connection Status List once again under Network Settings on the XMB to check your NAT Type. If your NAT Type is 2 or 1 your DMZ is working perfectly.
Note: This guide is work in progress. If there is something unclear, please let us know in this thread.

-

The "What are you playing...
-

PC and Steam General Discussion
-

General Movie Discussion
-

Tricky Towers and Rebel Galax...
-

The random talk whatever thread
-

Final Fantasy XV